One that I investigated was a firefox plugin called "Pencil". This is a freeware application, but I found it lacking when trying to show any sort of flow (it is really designed I think to provide a static prototype). Still, if you need a simple tool to show some buttons and forms, this might be a light weight way to achieve this.
The next tool I looked at was called ForeUI from EASynth. While the tool is a commerical product, the EASynth offers a full featured version as a demo which the user can use for 15 days. Some functionality (such as Save and Export) will be unavailable after this time period expires.
Installation/Setup
The install was clean and easy and the application launched on my Windows 7 laptop without any issues. A program group was added in my application bar under "EaSynth" which I would think many users might find confusing (since they installed ForeUI didn't they?) but once you get familiar with it, it should be easy enough to find for most users. It would appear that it is setup by default to look for a newer version of the software which will prompt the user when available:

Capabilities and Impressions...
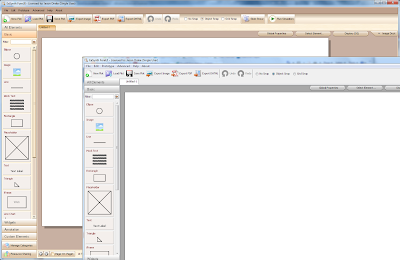
The first thing that impressed me about ForeUI was its clean user interface. My "paper" page was right in front of me, and the widget I could choose from were easy to find on the left. A toolbar/menu was present for the "actions".

In ForeUI, a plot concept is used to represent your "prototype". You can add multiple pages to your plot and provide actions to transition between pages.
Right away I was able to start adding widgets to my page and exploring deeper. One thing that I did find a little confusing at first was that you had to drag the components onto your page. It was not like Microsoft Powerpoint where you pick your element and click on the page to add it. This is similiar to most GUI-builder tools (like Matisse in Netbeans) and it didn't take me long to pick up the correct action. I was impressed with the components available to the user and they included both application components (group frames, calendars, menu bars) as well as components you might find in a website (images, mock text). The components available allow prototypers to develop a prototype for:
- Web sites
- Rich Web Applications / Desktop Applications
- Layouts (either was Web pages, blog or non-computer related layouts)
Once a component is dropped on the page the user has to ability to customize it further. Overall, I was quite pleased with the options which included:
- Changing the visibility
- Setting the state of a component (disabled, selected etc.)
- Specifying the font type, weight and color
- Defining the text of the component
- Z-Ordering of the component

One aspect I found very confusing was "where" a property option would be. Some options were only available from the toolbox (Group, Z-Order etc.) whereas other were available both from the context-menu and toolbox. Using the context menu is the most efficient, but I started finding myself ignoring it after a while because the options I was looking for were not present. The font for the components will be
dialog by default. This produced horrible looking "simulated prototypes" and I had to manually change the font on every component after I had added it. I discovered an option afterward in the Settings menu under the Plot tab where you can specify the default font which appeared to take care of this. One aspect of property editing which could be improved is the double-click edit text capability (you select an item in your page and double click it to edit the text). More the half the time, even when clicking quickly, any movement of the mouse would move the component (thus throwing off my alignment). You can edit text from the toolbox (the pencil icon top-left) and I quickly preferred this approach to avoid the movements of my items. Perhaps if it was not as sensitive (or the move was delayed) this would be a cleaner experience.
The user can move the component around the page either with a mouse-drag or by using the arrow keys (once selected). As you drag near other components, spacing guidelines will appear letting you know that you are aligned along the center, top, middle etc. This allows you to quick setup a user-interface and still have it aligned properly. The guidelines only appear after the item is on the page so you do have to get used to the double drop (ie. pick a widget drag it to your page and drop it. Then select and drag it around your page to get the guidelines). There are some quick options to align horizontally/vertically etc. if more than one item is selected. When you move and align an item with guidelines, there is no concept of spring boundaries (like in Matisse) such that if you add a text field to a window and set the textfield to be most of the width of the window, resizing the window will not resize the text field. There is also snap capabilities which is useful, however I found the default snap value (5 pixels) a little tight.
Grouping of items is supported however in order to do so, you need to carefully select the items and select the "Grouping" icon from the element toolkit (I am not sure why this is not available from the right-mouse context menu). If you stack several components on top of each other it can be difficult to select the right ones. You can get at buried items using the CTRL-left or CTRL-right keys.
You can add events on an item using the action capability. This is very powerful in communicating intent. The type of events you can add depends on the component used but include concepts like:
- changing the visibility (hiding/showing)
- changing selection (comboboxes, checkbox, tables)
- changing pages (navigating to a new screen)
The table component is a very polished read-only component for ForeUI. The data for the table is excepted as a comma delimited list (with the headers being the first row of data). I found the easiest way to create fake data was to use Excel and export the file as csv (and then copy/paste the CSV content from notepad into ForeUI). It would have been nicer if I could have input the data easier within the ForeUI tool, but I am happy with the end result. One thing that was lacking about the table was providing editable cells (as well as defining a component to use for the editor). I worked around this by dropping an editable component in the desired row above the table (Z-order wise). You seem to only be able to register a single "click event" you will not be able to take the user through a edit session easily. Providing the ability to supply actions / table cell does not appear to be supported and this would really allow for some complex client interactions. For this reason I switched to showing the application in a more static manner and instead used annotations to call out capabilities as the user mouses over components.
I was able to create a relatively accurate representation of my desired client in quick order. Since I was only designing a pop-up tool for my application, I decided to represent my application as a static image and then added a custom toolbar action as a launch point for the new client tool. In order to represent the lightbox affect, I had to drag a filled rectangle over the image (and under the popup tool) with an opacity setting. As I added new screens to the plot, I learned that if my page represented a popup tool, that I should focus first on these components and then add an main application image (with the partially transparent rectangle for masking) afterwards and send this to be back with the Z-order action. An example of a page I designed is here:

Several preview options are available include a Slide Show (showing each of your screens statically) and a Simulation tool which will run your pages in your browser (allowing you to click/iteract with the client). The following is a video I produced for one of the new features I want to implement that shows the simulation:
You can export the project to a variety of different formats including PDF, HTML or as images. The PDF and image formats of course do not provide interaction with the action events, however the DHTML option does output the actions you defined so you can interact with the client (likely using Javascript) using the simulation tool.
Technical Observations
- The ForeUI application is written in Java, which allows some nice customization ability such as applying different Look and Feels:
- The application when running consumes approximately 160 MB of memory (this was for a three page 50 element prototype with a few interactive actions). Overall this is not too bad and is less than the average requirements for an IDE like Eclipse with Java tooling.
- Overall performance and responsiveness was good, which to me shows me that the developers at EaSynth know how to develop proper Java Swing applications by not performing large computational operations on the Swing Event Thread.
- I did not run into any crashes, fatal errors or discernable bugs in the hours I have used the tool to date.

Conclusion
With a comprehensive toolkit, the ability to add actions and simulations, as well as online connectivity tools for help, tutorials and additional components I would rate the EaSynth ForeUI 2.X prototyping tool on a scale of ten as a value of

My biggest complaint would have to be the inconsistencies in interacting with the component properties and and look forward to exploring its capabilities deeper as I begin to prototype other areas of my application.
Disclaimer
EaSynth provided me with a complementary license to review their product. I think this is a great way for them to recieve more publication of their tool, however as a professional I would be amiss if I allowed this to interfere with my assessment of the product.